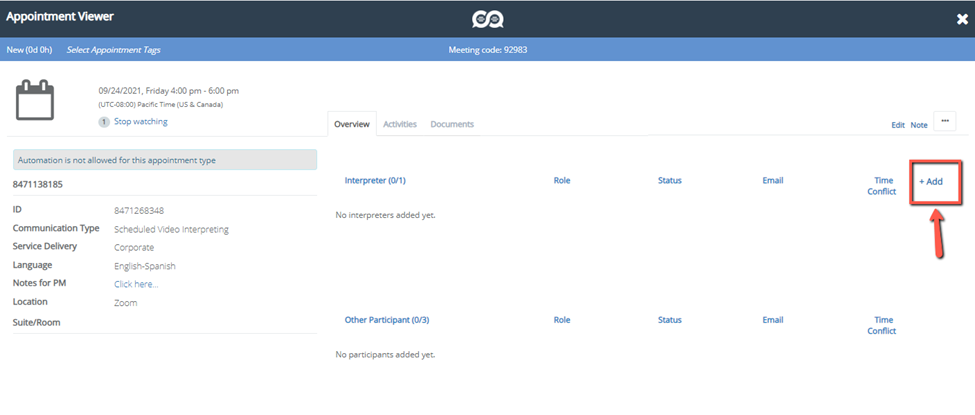
After the Appointment is created, the next step is to invite participants. Key points:
- In the Overview tab of Appointment Viewer, invitees will be divided into 2 sections: Interpreter and Other Participants
- To add Participants click “+ Add”
- This will open a new dialog where all users with matching permissions will be shown
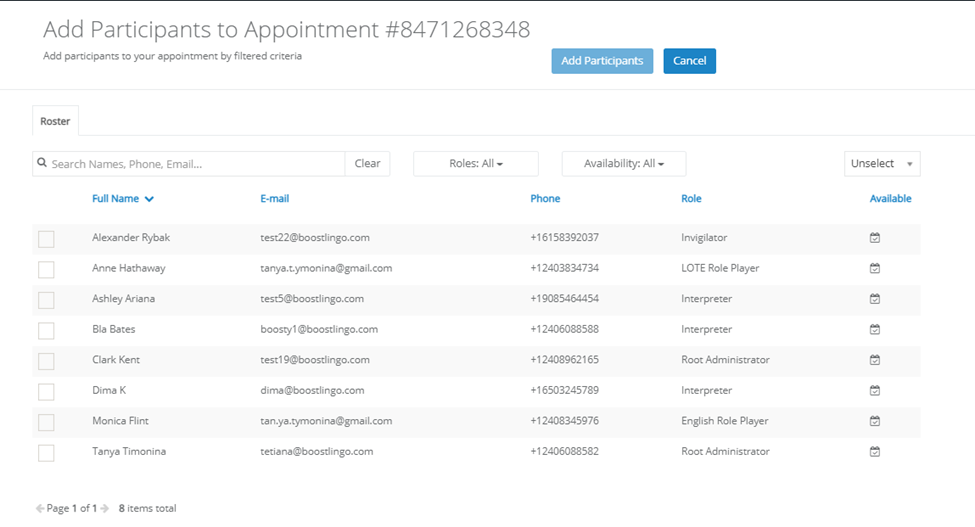
- You can filter users by role and availability or search by name, phone or email
- Only 1 interpreter can be invited
- Any amount of trainers (other participants) can be invited, but only up to 3 can be confirmed
- To invite participants - check the checkboxes next to each user and click Add Participants
When users are invited - an email notification will automatically be sent (those are optional and configurable). See the article "Appointment Notifications" for more details.